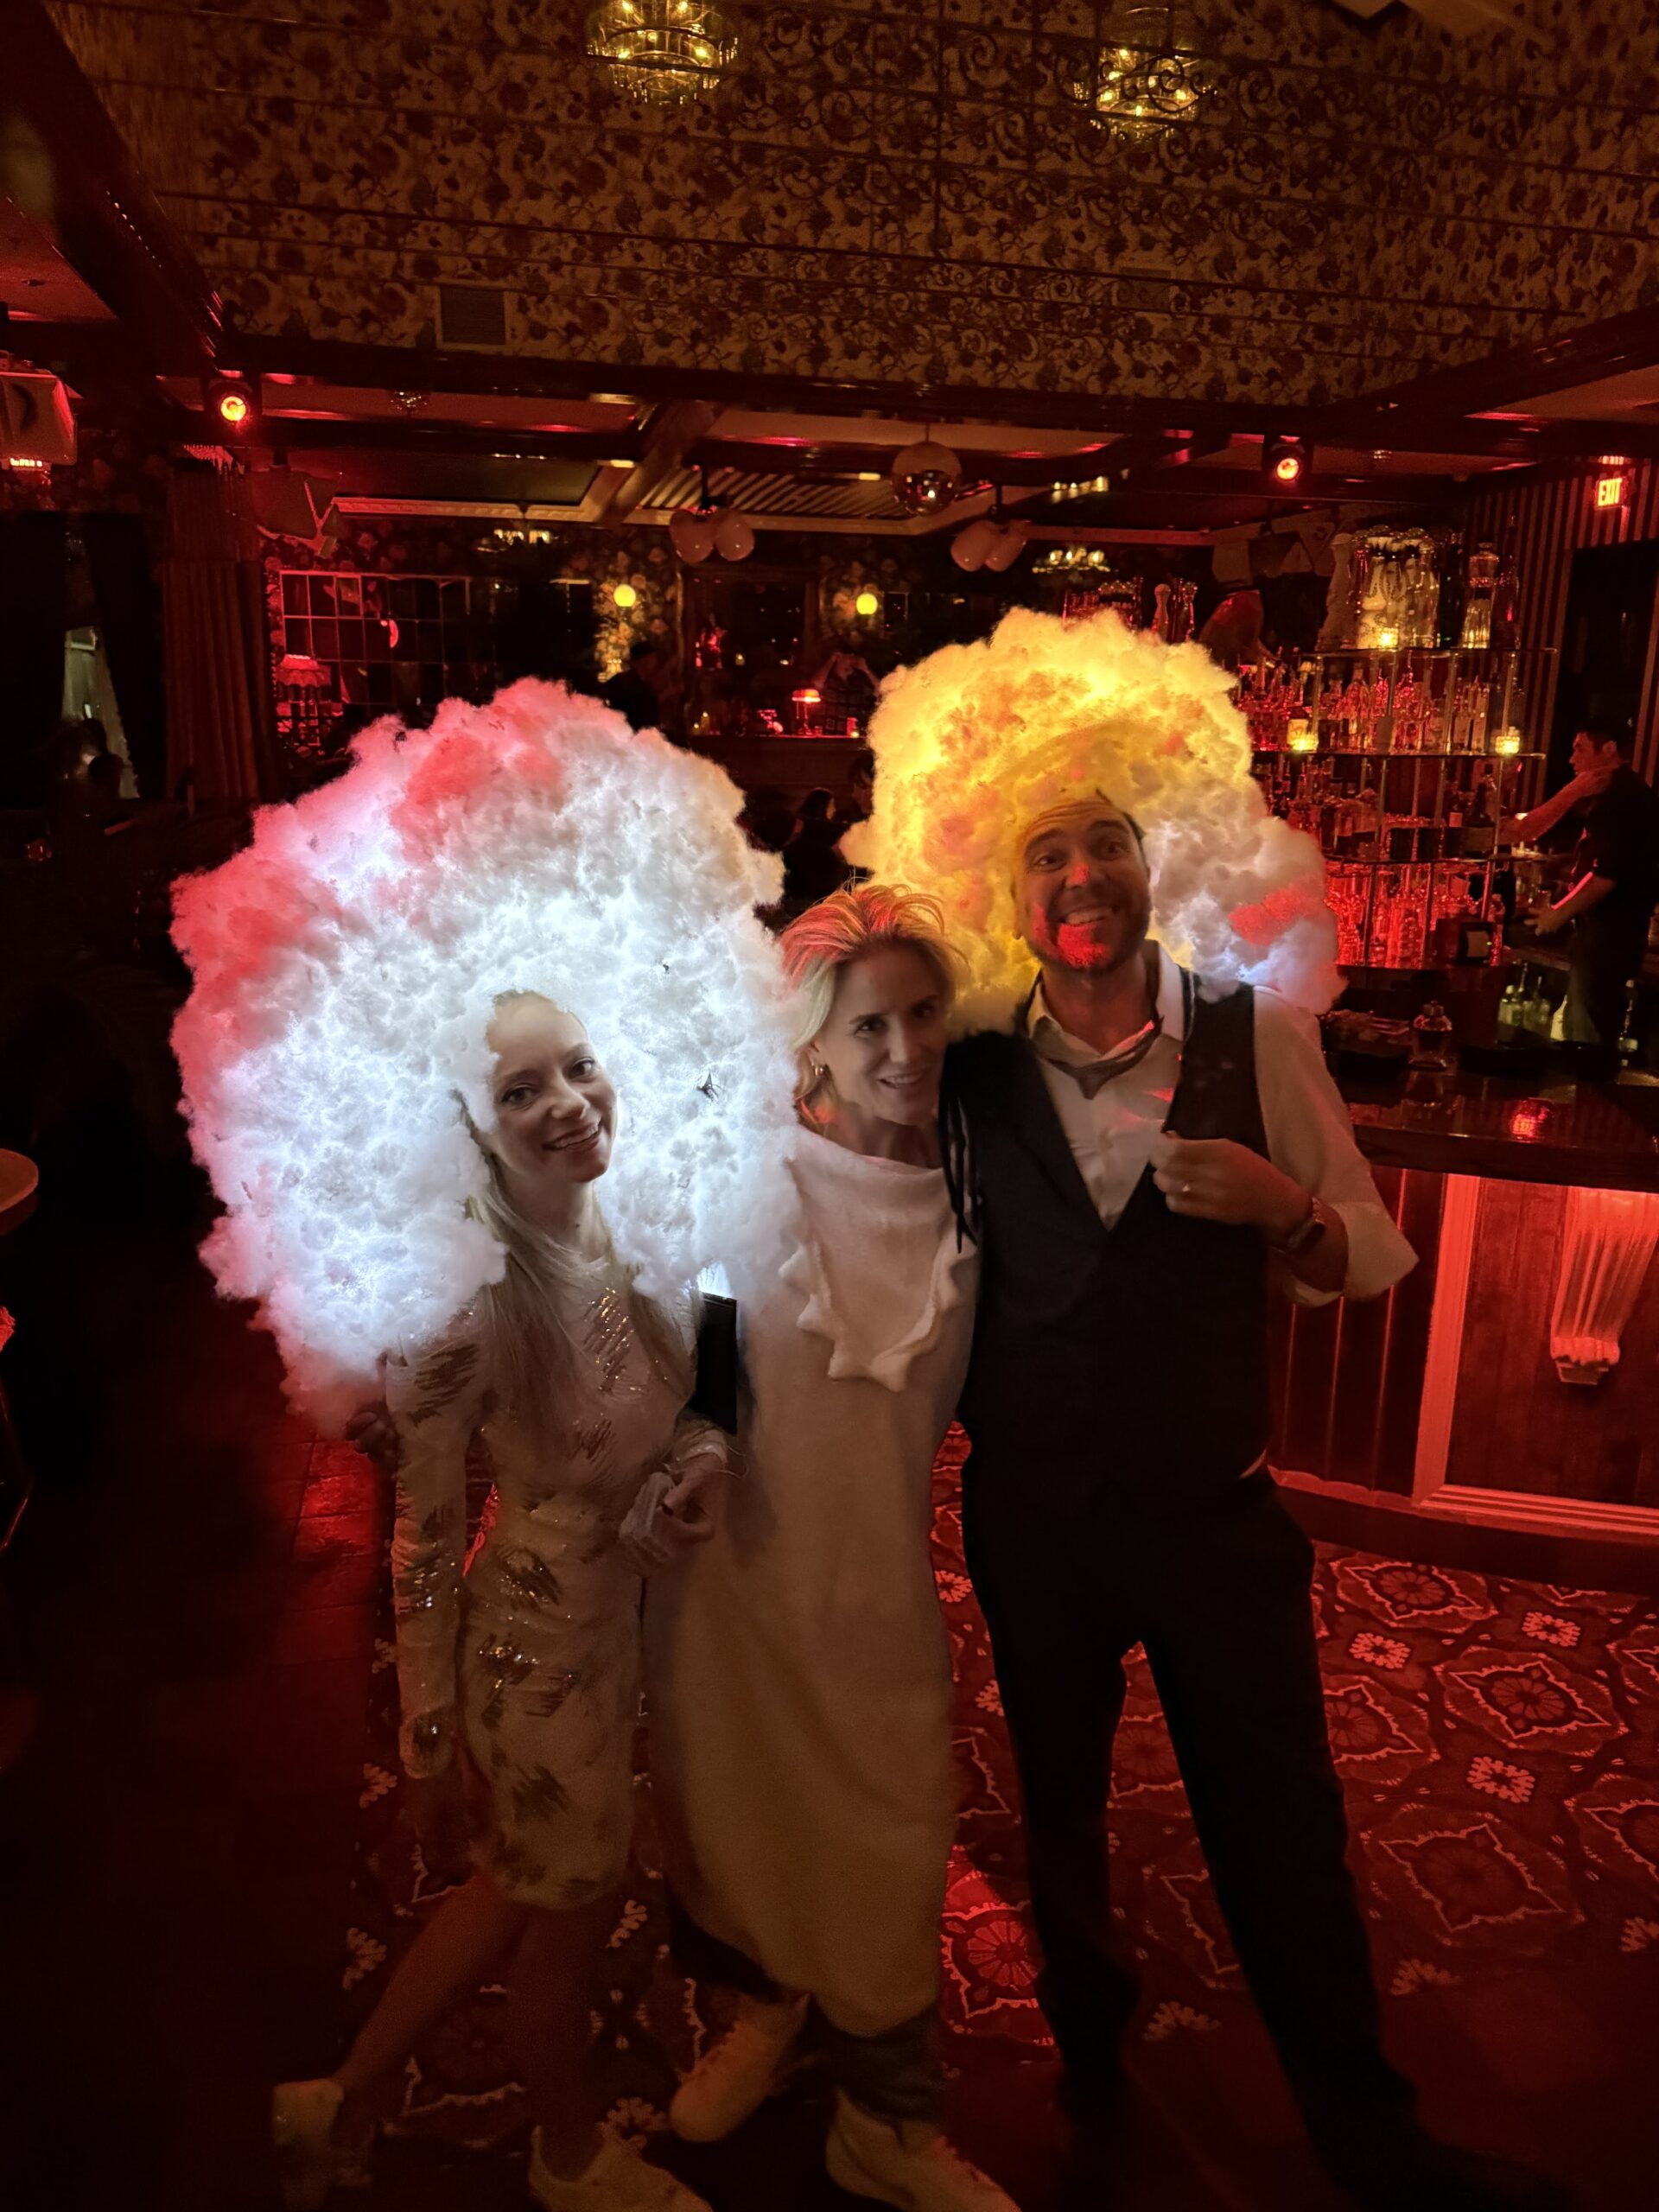
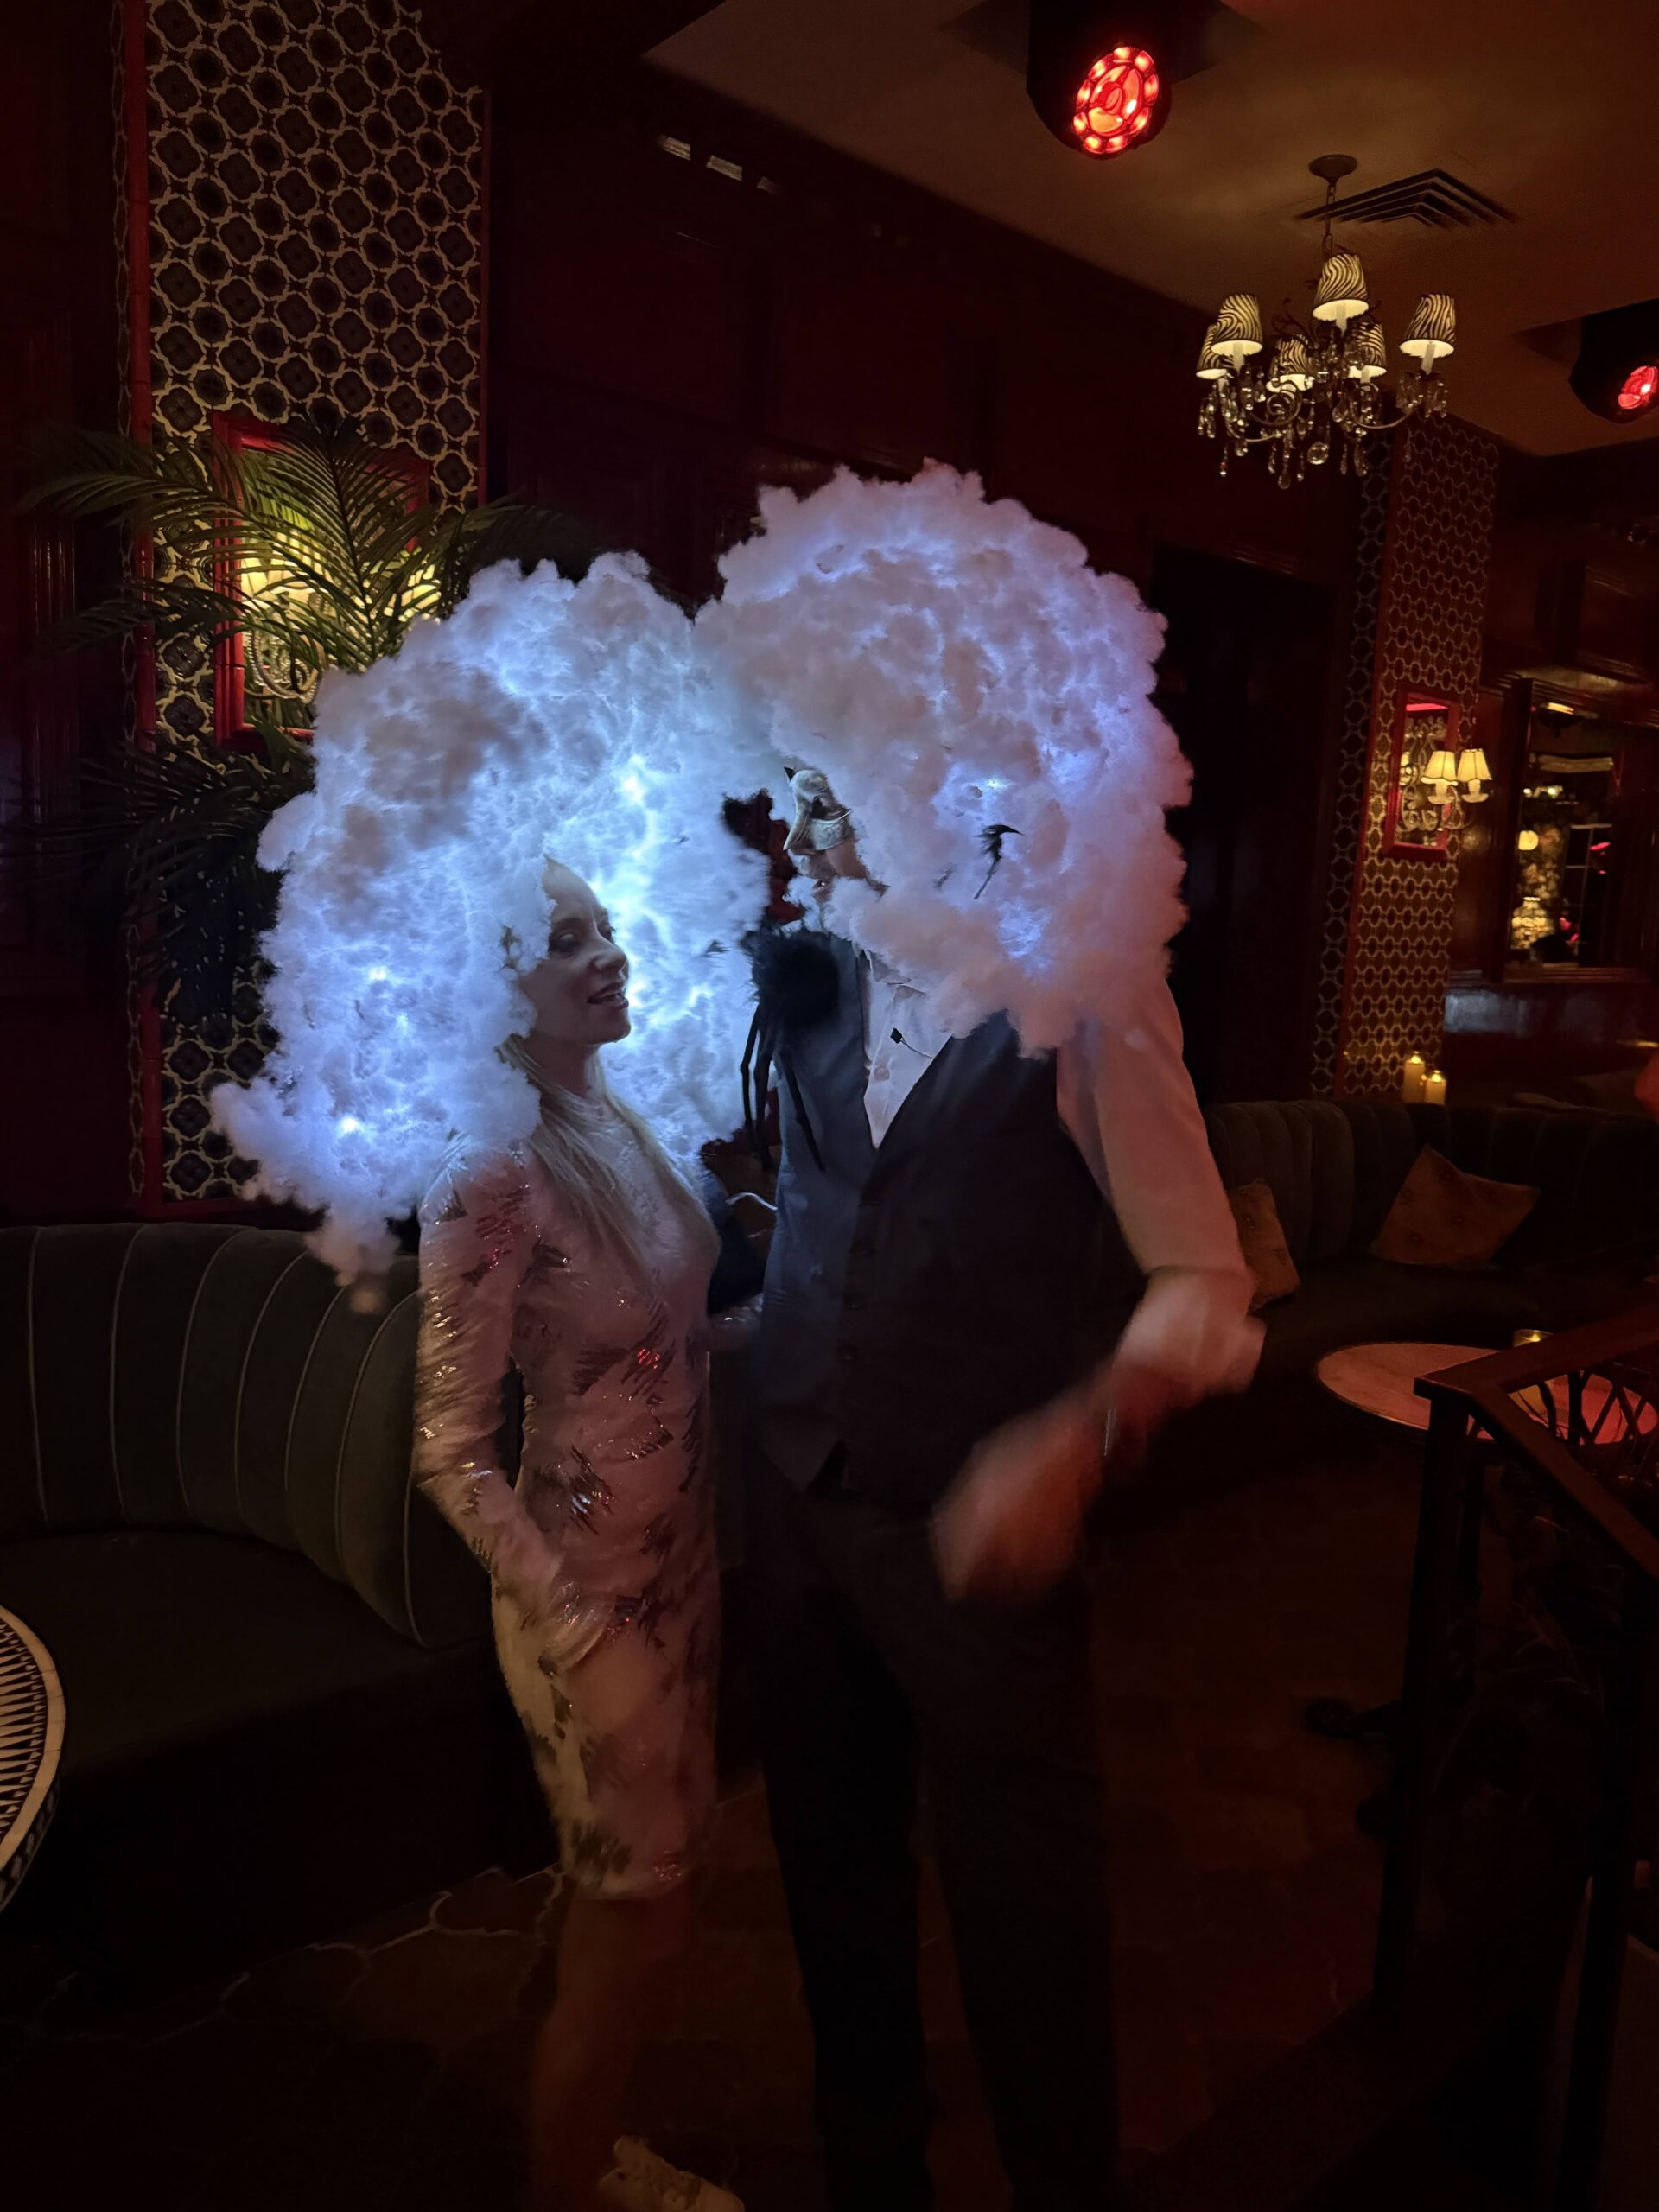
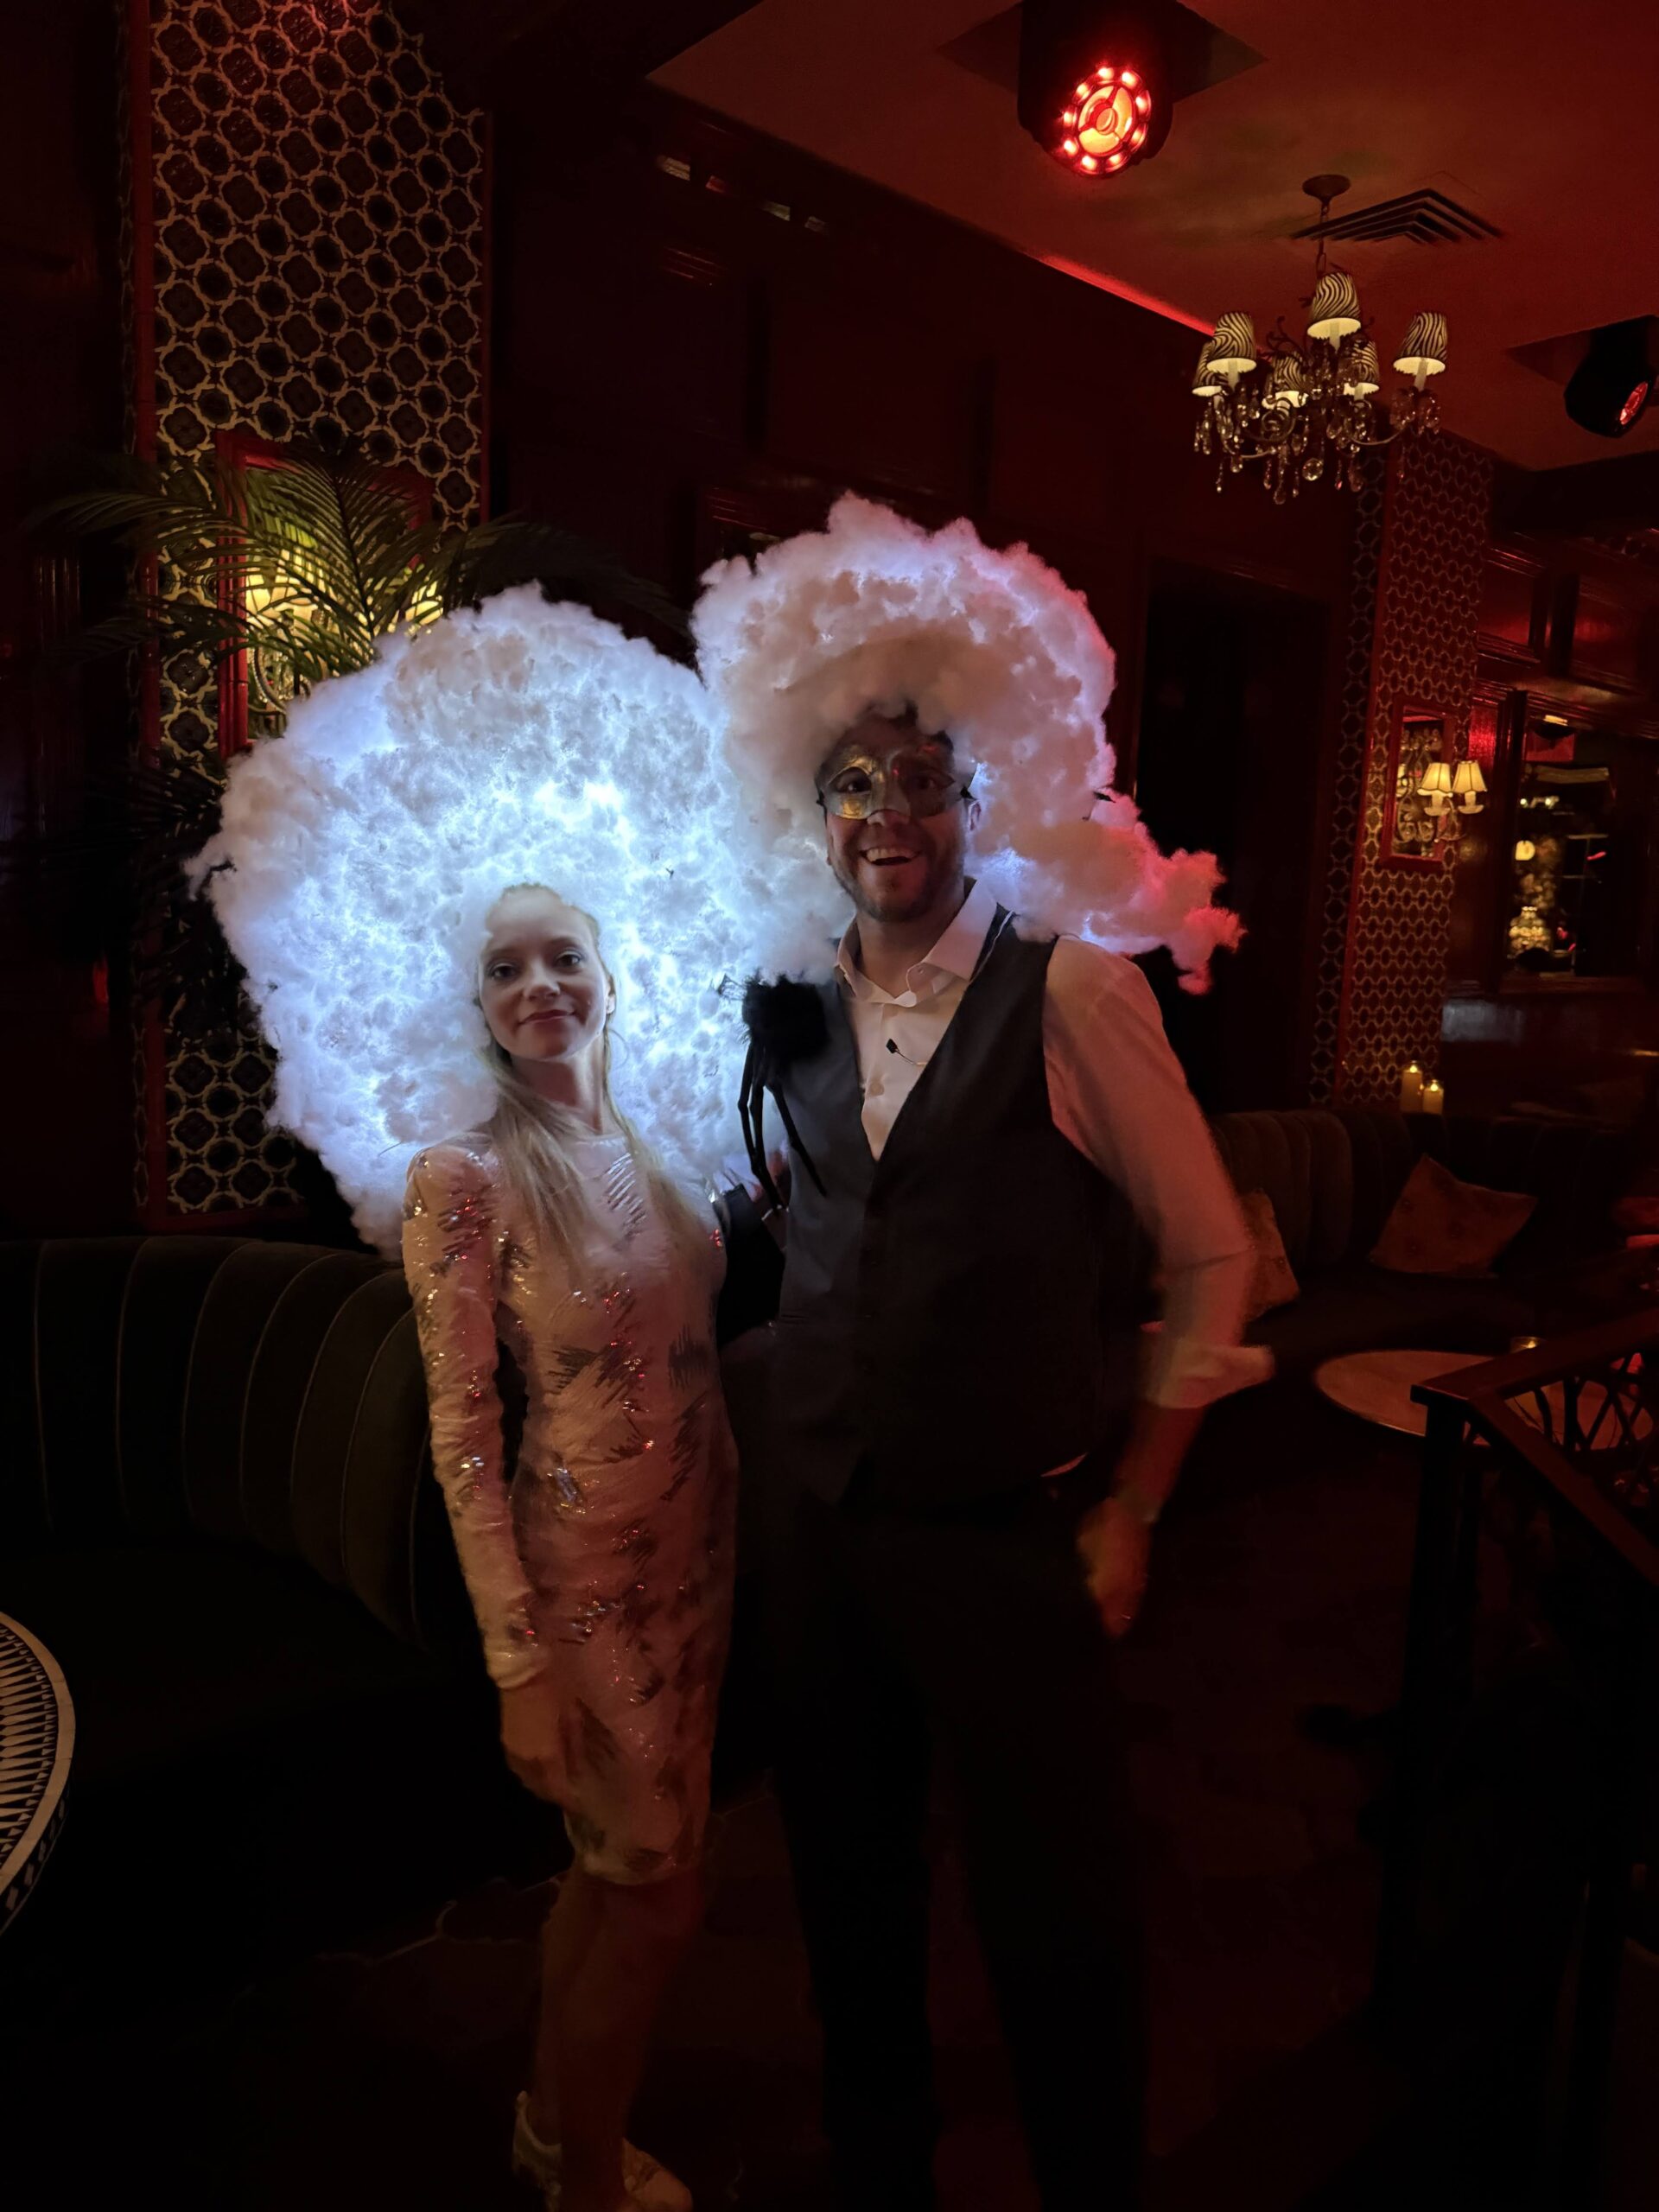
It was the day of our Halloween party and I still wasn’t excited about any of the things we were thinking of going as. They were – boring. Then, it hit me light a bolt of lightening – we should be a thunder and lightning cloud! I haven’t seen it done well (people usually go as a cloud – that’s no fun), it’s sure to standout in an otherwise dark club, and it should be pretty comfortable to wear all night! My husband was taking a nap, I woke him up to let him know we’re going to be lightening for the party starting in a few hours and off to the store I went.
Why you should try it: it’s a pretty easy costume to make, quick to throw together, and really inexpensive especially for the wow factor it garners.

Materials
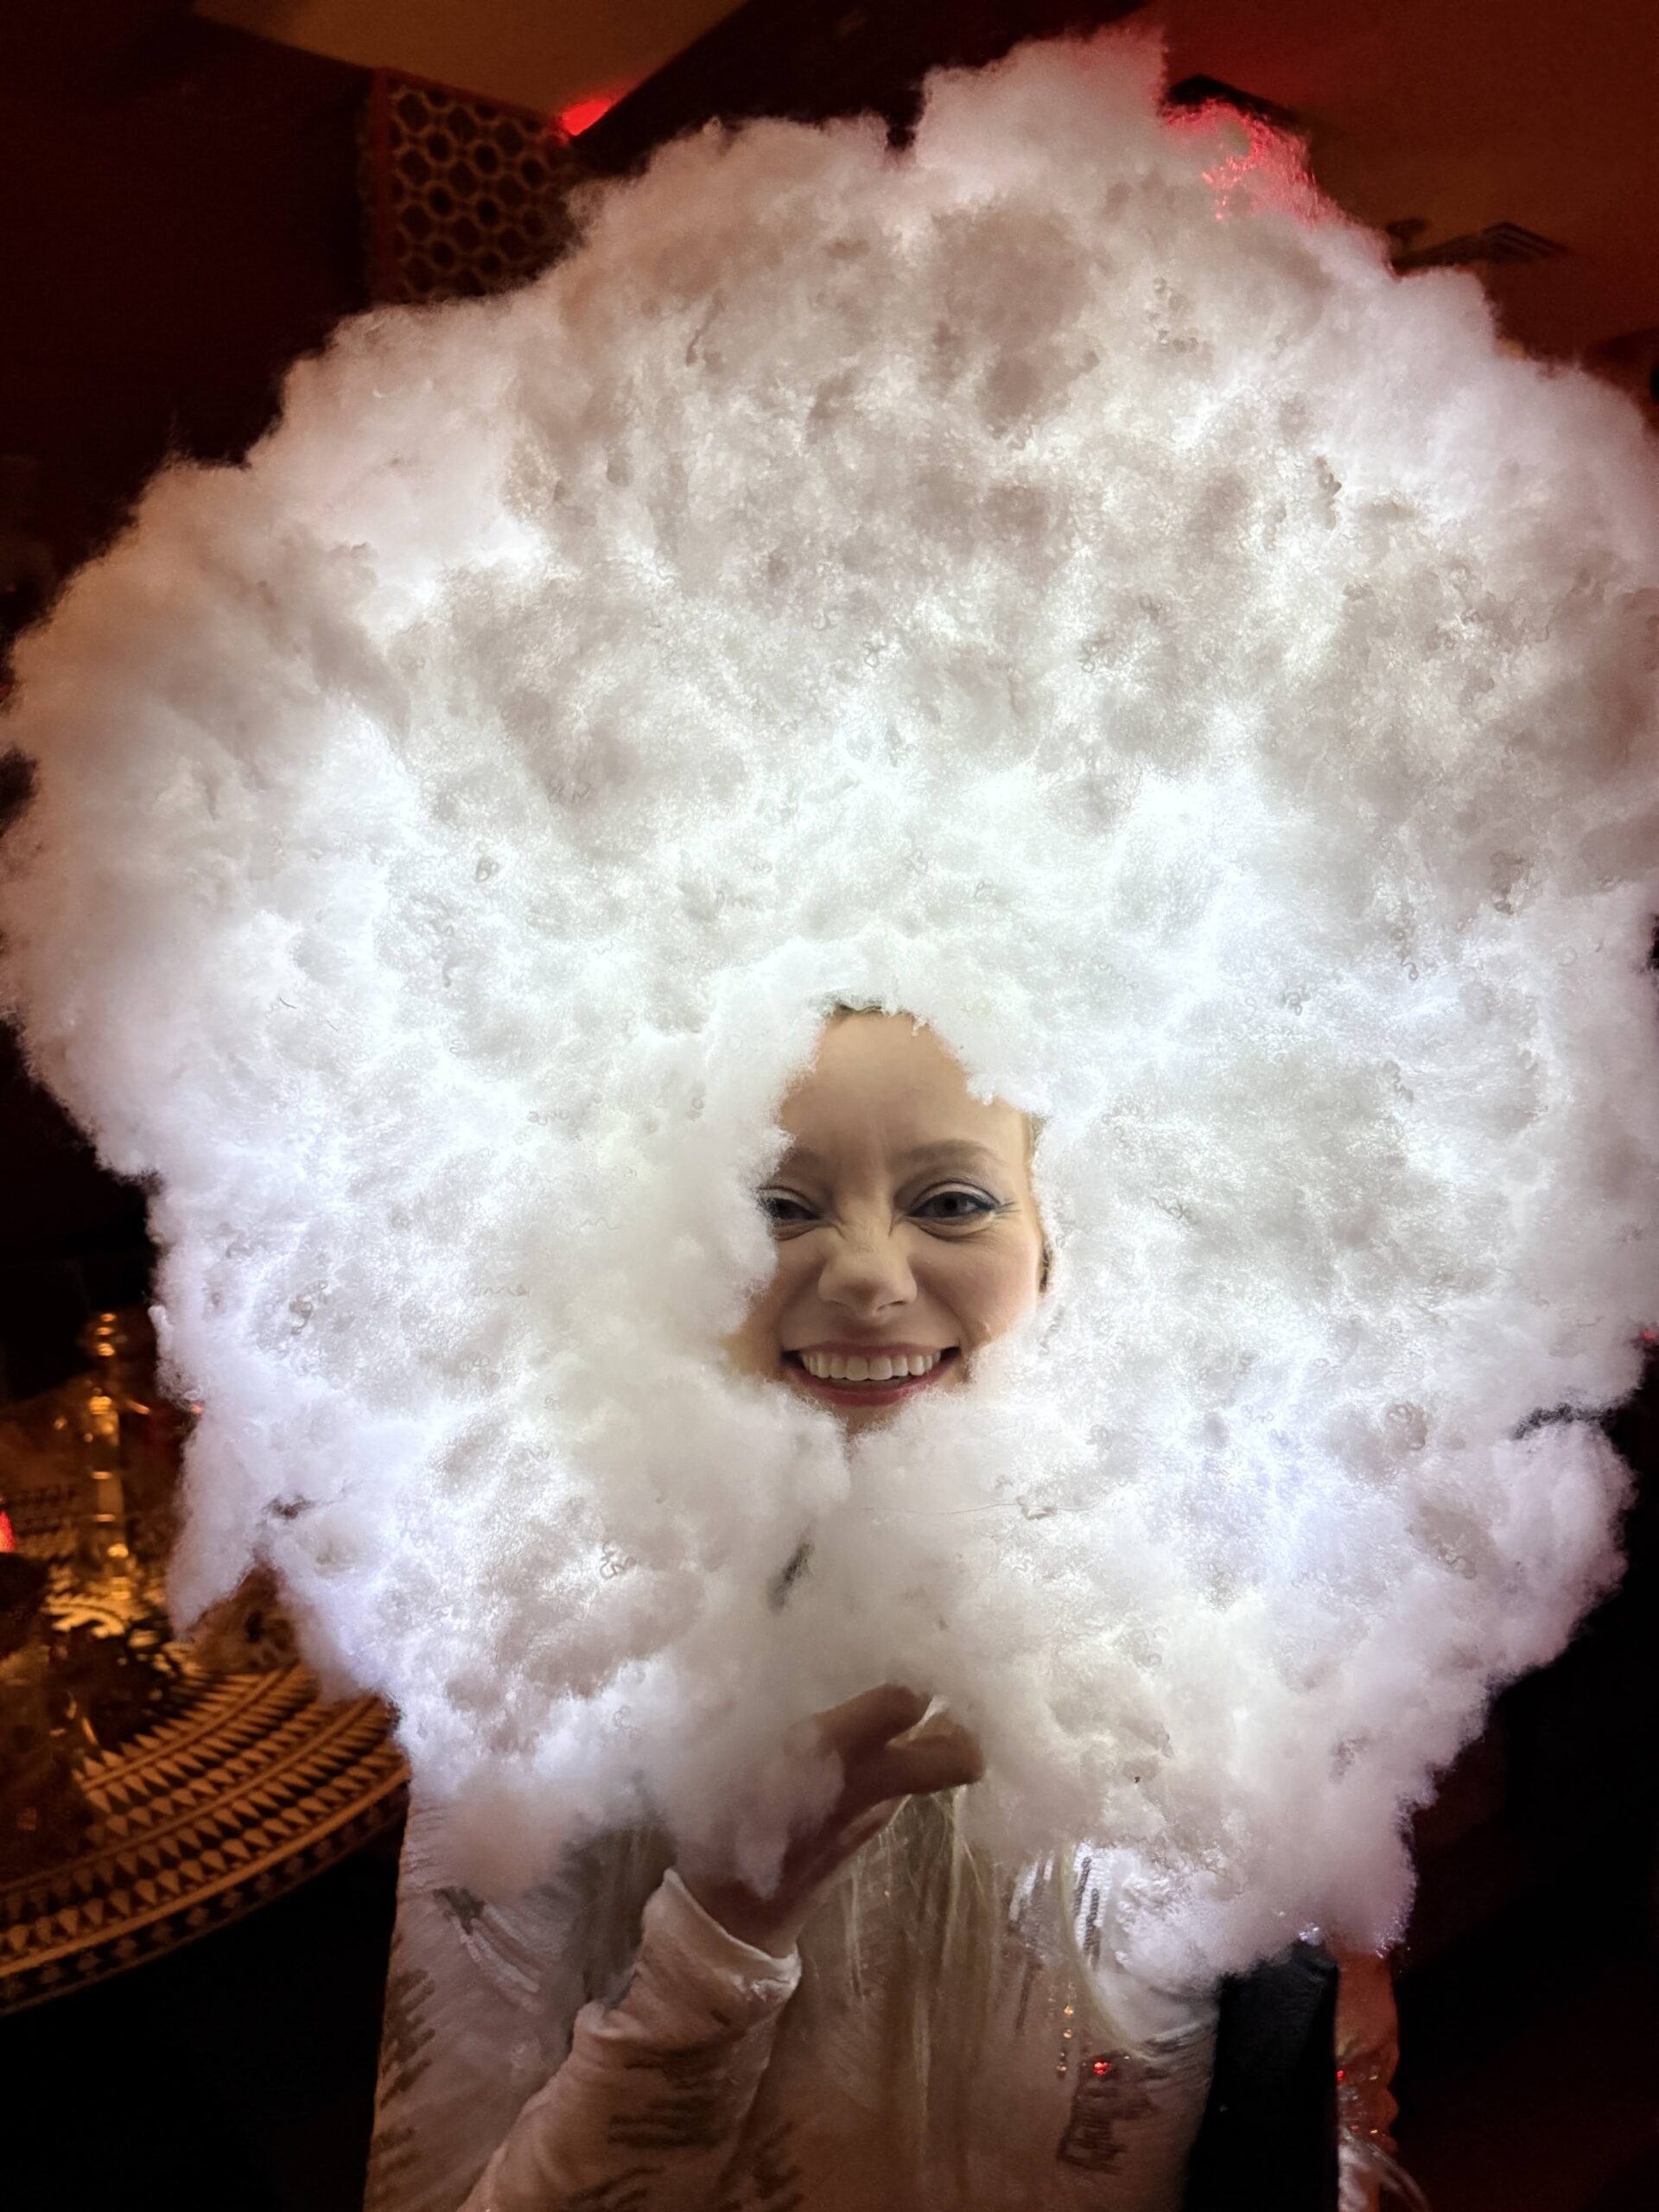
- Pillow stuffing
- Spray adhesive (any strong kind should work)
- A hat or a headband for the base to wear. In the photos I went with a headband base and my husbands was a cowboy hat base.
- At least two fairy light strands that blink or the light moves. One in warm white and one in white or cool white. They should have an on/off switch. It’s best if it uses a very tiny battery (avoid AA or AAA types) so it’s easy and lightweight for hiding the battery pack. If it doesn’t have a blinky setting it’s okay but not as ideal.
How to make it
- The adhesive is very smelly so it’s best to do this in a garage, well ventilated area, or outside. Be sure you lay something down you can toss in the area you’ll be working in because whatever you spray it on will be super sticky – we used butcher block paper.
- After the base is covered, start spraying the stuffing to other stuffing you add to it until you have the shape you want.
- It’s best to intertwine the lights as you make the cloud hat/headpiece. But, because the fluff is so forgiving you can weave it through after you’re done, worst case.
- Spray the base (hat or headband) and spray the stuffing at the spot you want it to connect, stick them to each other. Let it set (usually just a few minutes). Repeat.
- If you’re making a headpiece you can lay it flat while you make it. Be sure to add more fluff to the front and back so it’s more 3D when you’re done.
- We left our cool light color on the whole time when we went out so that light sets battery pack can get hidden in the base or somewhere near your head. We manually turned on/off the warm set so we kept that battery pack at waist length so we can put it in our purse/pocket to turn on/off. You can black out the lights that are outside the hat portion between the hat and your pocket/purse/waist
- When everything is done shake it a bit to make sure it’s pretty stable. If any fluff comes off spray those areas a lot and stick it back in then let it set again.
We had a great time in these costumes. Added bonus – there are so many fun puns you can do around this to jazz it up:
- Your head is in the clouds
- Cloudy with a chance of meatballs (add meatballs to your shoulders)
- Raining Cats & Dogs (add cats/dogs to your shoulders)
- Cloud 9 (add a 9 on the front)
If I had to do it again I’d get this cloud lighting set from Amazon (way easier) and then attach it to a headband or tear it apart and place it around a hat.
It was fun watching my husband walk around because he was so easy to spot, he said the same about me when I walked around.